Hot Topics
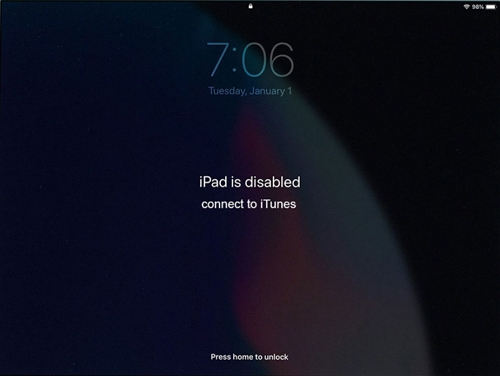
It can be incredibly frustrating to find your iPad locked with the message "iPad is disabled, connect to iTunes." This message appears when the device has had too many incorrect passcode attempts, automatically disabling the iPad as a security measure to prevent unauthorized access.
If you're locked out, don't worry – there are several effective ways to resolve this issue and regain access to your device. This guide will walk you through each method, explaining why the error occurs and offering various solutions, whether you want to use iTunes or prefer an alternative.
You'll encounter the "iPad is disabled, connect to iTunes" message if you've entered the wrong passcode multiple times. This feature is a built-in security measure by Apple to limit unauthorized access attempts. If you enter the wrong passcode ten times, the device permanently locks, and the only way to access it is by resetting it – often requiring a connection to iTunes.
Before this permanent lock, Apple temporarily disables the iPad for progressively longer intervals based on incorrect passcode attempts:
But even if iTunes or Finder isn't your preferred option, there are other ways to resolve this error and restore access to your iPad. Let's explore each of these methods.
If you'd prefer not to use iTunes or if iTunes is not working, Unlockit for iPhone is an ideal alternative. This powerful tool can unlock a disabled iPad without requiring iTunes, an Apple ID, or a passcode.
Additionally, it's compatible with all iPad models and supports both Windows and Mac systems. With just a few clicks, Unlockit can reset your disabled iPad and help you regain access.
Here're the steps to Unlock iPad Using Unlockit for iPhone:
Step 1. Download and install Unlockit on your computer.
Step 2. Open the program, on the main interface, select "Unlock Screen Passcode" and click "Start."
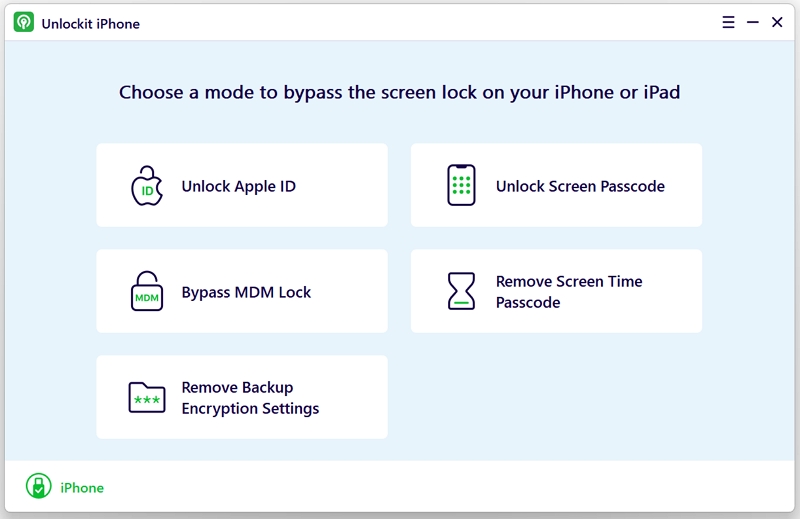
Step 3. Then, connect your disabled iPad to the computer using a USB cable.

Step 4. The software will prompt you to download the latest firmware. Click "Download" to begin downloading the firmware package.
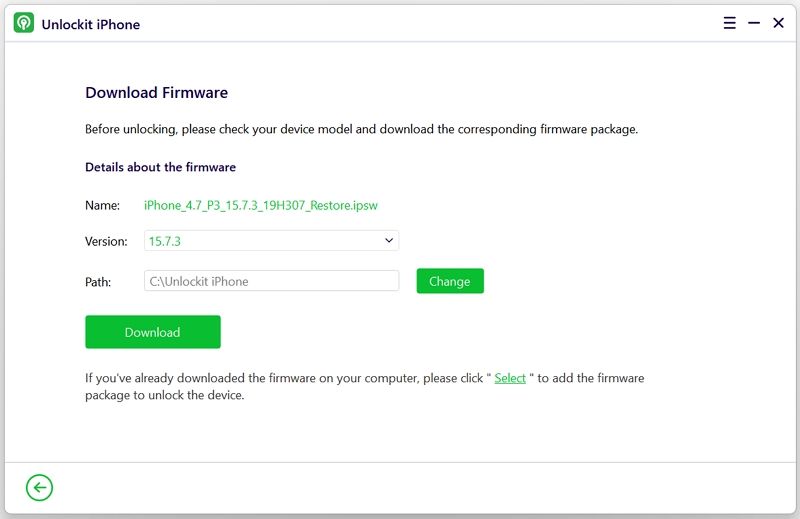
Step 5. Once downloaded, click "Remove" to erase the disabled status and any restrictions. Ensure the device remains connected until the process is complete.

Once completed, your iPad will be fully accessible, ready for you to set up as new or restore from a backup if you have one.
If you prefer to use iTunes or Finder, this method can help you reset your iPad. Here's how:
Step 1. Open iTunes on a PC or Finder on a Mac.
Step 2. Connect your iPad to the computer, and enter recovery mode on your iPad based on its model:
For iPads with Face ID: Press and hold the Power and Volume Down buttons. Drag the slider to shut down, then continue holding the Power button while connecting the iPad to your computer. Release it when the recovery mode screen appears.

For iPads with a Home Button: Turn off the device, hold the Power button, and connect the iPad to the computer. Release the button when you see the recovery mode screen.

Step 3. In iTunes or Finder, select the iPad icon.
Step 4. Click "Restore." iTunes/Finder will download and install the latest firmware for your iPad. If the process takes over 15 minutes, you may need to re-enter recovery mode.

If you've enabled the "Find My iPad" feature, you can reset the disabled iPad through iCloud without using iTunes or Finder. This method works well if you have another device available or don't have access to your iPad physically. Here's how to do it:
Note: This method erases all data on the iPad. If you didn't back up beforehand, data recovery is not possible. You must also know the Apple ID and password associated with the device to use this method.
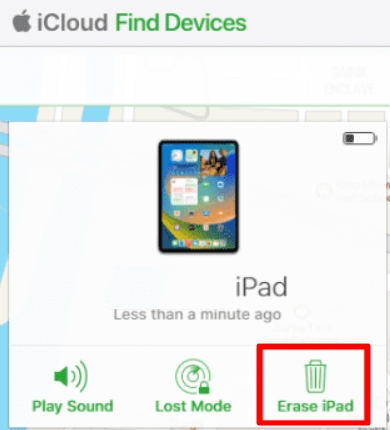
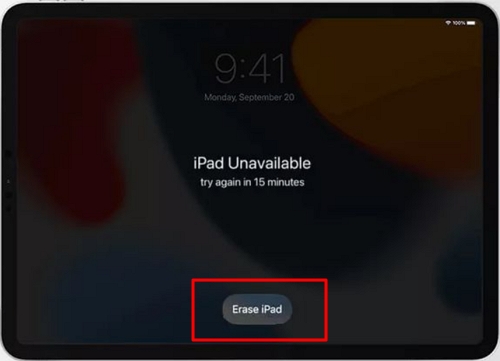
Apple updated the screen message from "iPad Disabled" to "iPad Unavailable" starting with iPadOS 15.2. And, if your iPad is running iPadOS 15.2 or later, has an internet connection, and has "Find My" enabled, you might see the "Erase iPad" option directly on the screen after multiple incorrect passcode attempts.
Afterward, you can set up the iPad and create a new passcode. This option is convenient and works without requiring a computer.
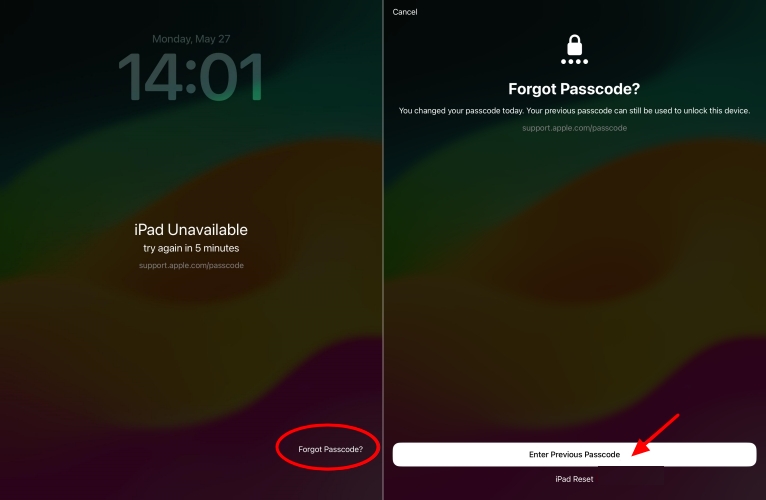
In iPadOS 17, Apple introduced a feature allowing users to reset their passcode using a previous one if they've recently changed it and forgotten it. This feature is ideal if you recently updated the passcode but forgot it shortly after.
Note: This feature only works if the previous passcode was used within the last 72 hours, making it an ideal solution for recent passcode updates.
When faced with an "iPad is disabled" issue, Unlockit iPhone provides a simple and effective way to regain access without needing iTunes or iCloud. Its user-friendly interface, compatibility across all iPad models, and lack of requirement for an Apple ID or passcode make it a great solution for many users.
If you prefer traditional methods, using iTunes, Finder, or the iCloud Find My feature can also help you unlock the iPad. For those with the latest iPadOS updates, built-in options like "Erase iPad" and "Passcode Reset" further simplify the process.
In any case, always remember to back up your iPad regularly. With so many options available, there's a solution for everyone, regardless of your setup or software preferences. Whether you choose Unlockit or one of the other methods, you're just a few steps away from restoring full access to your iPad.
