 by Maggie Mueller
Updated On Aug 12, 2024
Published On Aug 12, 2024
Basic iPhone Tips Ideal for Newbies
by Maggie Mueller
Updated On Aug 12, 2024
Published On Aug 12, 2024
Basic iPhone Tips Ideal for Newbies
Although iOS 18 Beta can bring many cool features, the beta version is used for testing purposes and, as such, can often have many bugs that Apple needs to iron out before releasing it to the public.
Many iPhone users have reported several problems with iOS 18 Beta, some troublesome enough to prevent them from using their devices efficiently. If you are experiencing issues after installing the iOS 18 Beta, this article will show you how to downgrade iOS 18 Beta to iOS 17.
The simple answer is yes, it is possible to downgrade iOS 18 Beta to iOS 17. Since iOS 18 Beta is still new and Apple is still signing iOS 17, the most recent public version, you can easily remove iOS 18 Beta from your device by installing iOS 17. You can do this by restoring the device using iTunes/Finder, or using a third-party app.
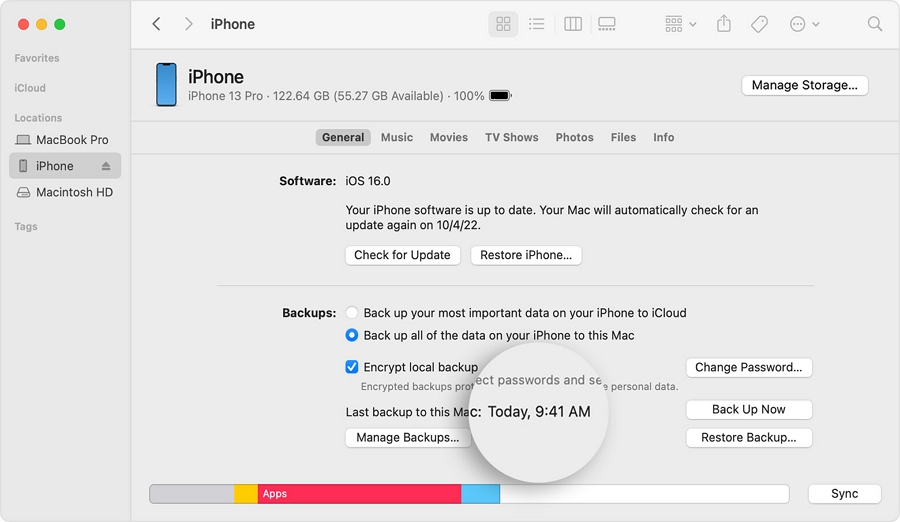
You will need to create a backup using either iTunes (for PC), Finder (for Mac), or by enabling iCloud backup on your device before downgrading. This precaution ensures that you can recover your data if something goes wrong during the downgrade process.
However, even if you have an iOS backup that you created using iOS 18 Beta on iCloud or on your computer, you will not be able to restore the backup to your device after downgrading to iOS 17. This is because iOS backups are incompatible with earlier versions of iOS. If you don't have a backup made before installing iOS 18 Beta, you will lose all your data after downgrading.

Disable Find My iPhone on your device to ensure the downgrading process runs smoothly and your device doesn't get stuck on the Activation Lock screen after downgrading. To do this, go to Settings > Find My > Find My iPhone and turn it off.

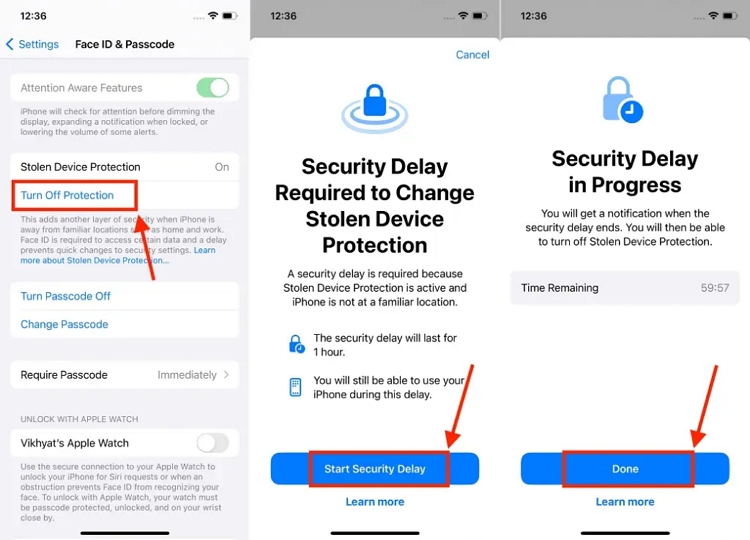
If you have enabled the "Stolen Device Protection" service on your iPhone, you will also need to disable it before downgrading. To do this, go to Settings > Face ID & Passcode > Stolen Device Protection and switch it off.
Ensure your device is adequately charged before starting the downgrade to avoid a sudden power outage that could interfere with the process.
If you want an easy and seamless way to remove iOS 18 from your iPhone or iPad, we recommend using the premier iOS downgrade tool, TinyFix. This tool offers a straightforward way with the highest success rate to downgrade iOS 18 to iOS 17 in minutes. TinyFix is valuable for iPhone and iPad users for the following reasons:
Here's how you can use TinyFix to downgrade iOS 18 to iOS 17:
Step 1: Download and install TinyFix on your computer.
Step 2: Open TinyFix after installation and select "iOS System Repair" on the main page.

Step 3: Choose "Deep Repair Mode" on the next screen and use the device's lightning cable to connect the iPhone to the computer.

Step 4: On the next screen, you will see the iOS 17 firmware. Click "Download" to start downloading the firmware package.

Step 5: When TinyFix has downloaded the firmware, click "Fix Now" to install it on the device. Your iPhone will restart when the process is complete.

You can also choose to downgrade iOS 18 to iOS 17 using Finder or iTunes. Follow these steps:
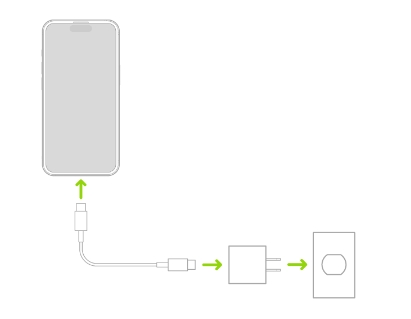
Step 1: Connect the iPhone or iPad to your computer using a USB cable.
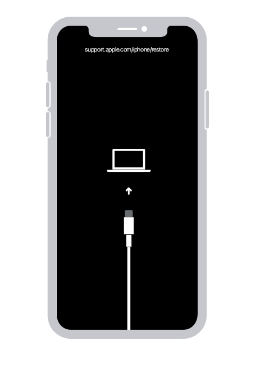
Step 2: Put your device in recovery mode. To do this, press and release the Volume Up button, press and release the Volume Down button, then press and hold the Power Button. Continue holding the Power Button until you see the recovery mode icon.
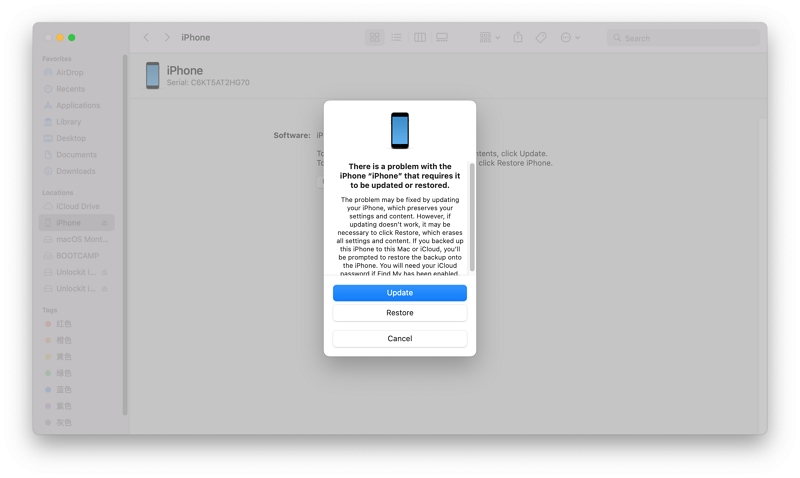
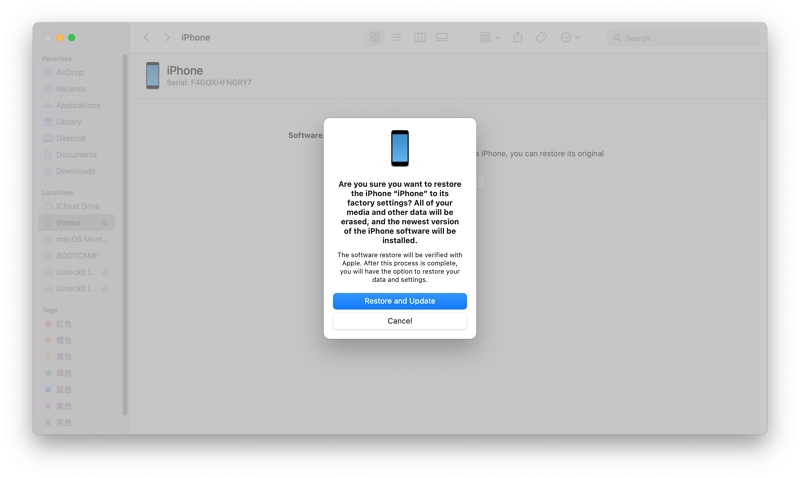
Step 3: Open iTunes on your PC or the iPhone's folder in Finder if you are using a Mac. When prompted, click "Allow" to get the computer to trust the device.
Step 4: If you don't see a prompt asking you to restore the device, find the "Restore" button and click on "Restore and Update."
Step 5: The latest public version of iOS 17 will be installed on the iPhone. Keep the device connected to the computer until the process is complete.
This process shouldn't take more than 15 minutes. If it does, your iPhone may exit recovery mode, and you may need to repeat the steps above to enter recovery mode again.
Manually selecting the IPSW file for iOS 17.6 and installing it to your device using iTunes or Finder is also a working way to downgrade from iOS 18 to iOS 17. Here's how:
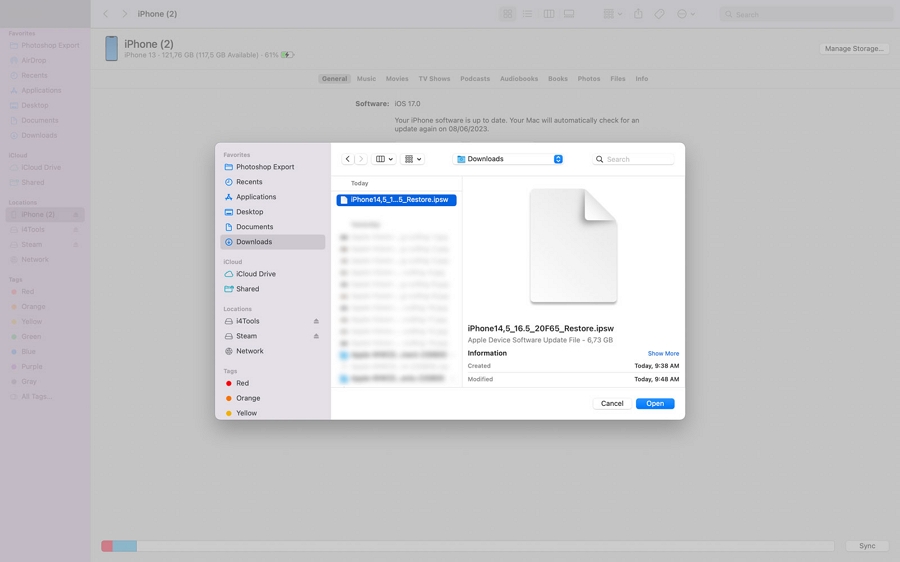
Step 1: Download the IPSW file for iOS 17.6 from IPSW website, such as https://ipsw.me/.
Step 2: Open Finder or iTunes (for PC).
Step 3: Connect the iPhone or iPad to the computer using its USB-C cable.
Step 4: Select the device in iTunes or Finder and click the "Backup Now" button to create a backup of all the data on your device.
Step 5: When the backup is complete, hold down the Option Button (Mac) or the Alt Button (PC) and click on the "Restore iPhone/iPad" button. In the popup window that appears, select the IPSW file that you downloaded in Step 1.
Step 6: When the restore process is complete, follow the on-screen instructions to complete the activation process.
The process of downgrading your device to iOS 17 will wipe all data and settings from the device, and you will need to set it up again.
If you have made any iOS 17 backups on your computer before upgrading to iOS 18 Beta, you can restore your data from the backup using iTunes or Finder on your computer.
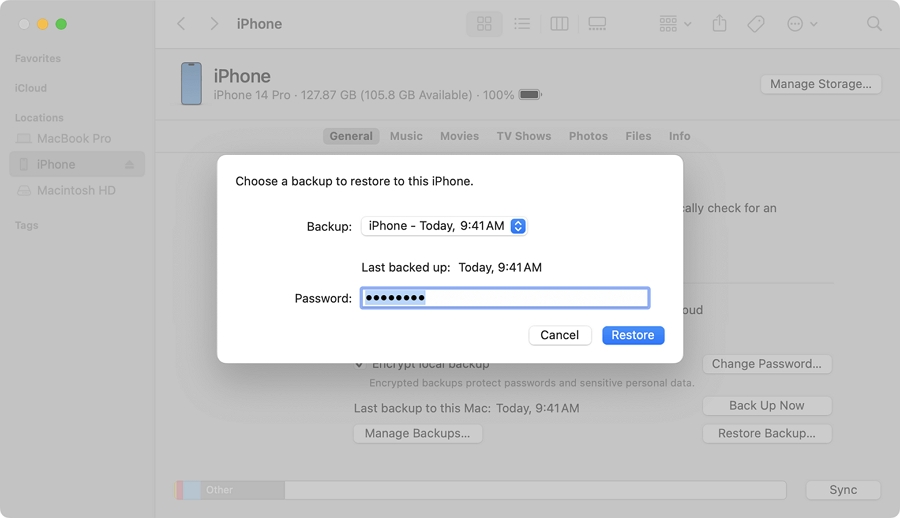
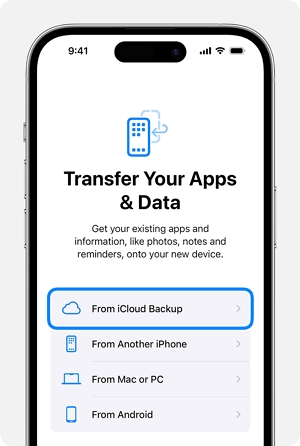
If you have an iOS 17 iCloud backup, you only need to connect the device to a Wi-Fi network, sign in to your Apple ID, and choose the latest backup. The process shouldn't take very long.
How to stop receiving the iOS 18 Beta update?
Removing the iOS or iPadOS beta from your device is very easy. Just go to Settings > General > Software Update > Beta Updates and turn it off.
Will downgrading iOS 18 to iOS 17 cause data loss?
The process of downgrading iOS 18 to iOS 17 will cause data loss, no matter which method you choose. However, as long as you have a recent iOS 17 backup, you can restore the backup to your device to avoid data loss.
Installing iOS 18 Beta on your device is simple, but users often encounter numerous issues when they want to go back to the more stable version of iOS. Each of the solutions above should help you do that more easily. Although we recommend choosing TinyFix if you are looking for an easy and quick way to downgrade from iOS 18 Beta.
